Turkey Roulade Tutorial (Sous-Vide)


I've been making Turkey Roulade for about 5 years so I thought it would be fitting to write up a tutorial. I make about 3-5 of these a year and have blogged about them 6 times. The Roulade is a crowd and family pleaser. Anyhow the pictures below are a culmination of everything I did over the years including this year too (2018). I believe I've captured every step along the way. I must have taken over 300 photos over the years and cut them down to just a few. I am hoping these pictures will help you make your own. We will be using Transglutaminase so have some handy. I prefer the RM which has excellent binding properties and easy to use. I use a powdered sugar shaker to dispense.


Buy either a whole breast or a whole Turkey. Doesn't make a difference. Best bang for the buck is a whole Turkey, but sometimes only the breast is available depending on what time of the year the purchase is being made.

Break down your bird, being very careful to preserve as much Breast skin as possible. Even if you have to sacrifice some thigh or leg skin, that's ok. Don't forget...it's the skin that will wrap this whole baby up into one sweet little bundle of joy. If you are starting with the breast, you can obviously skip this part. If you do not know how to break down a whole turkey, there are many videos online to help with that task.

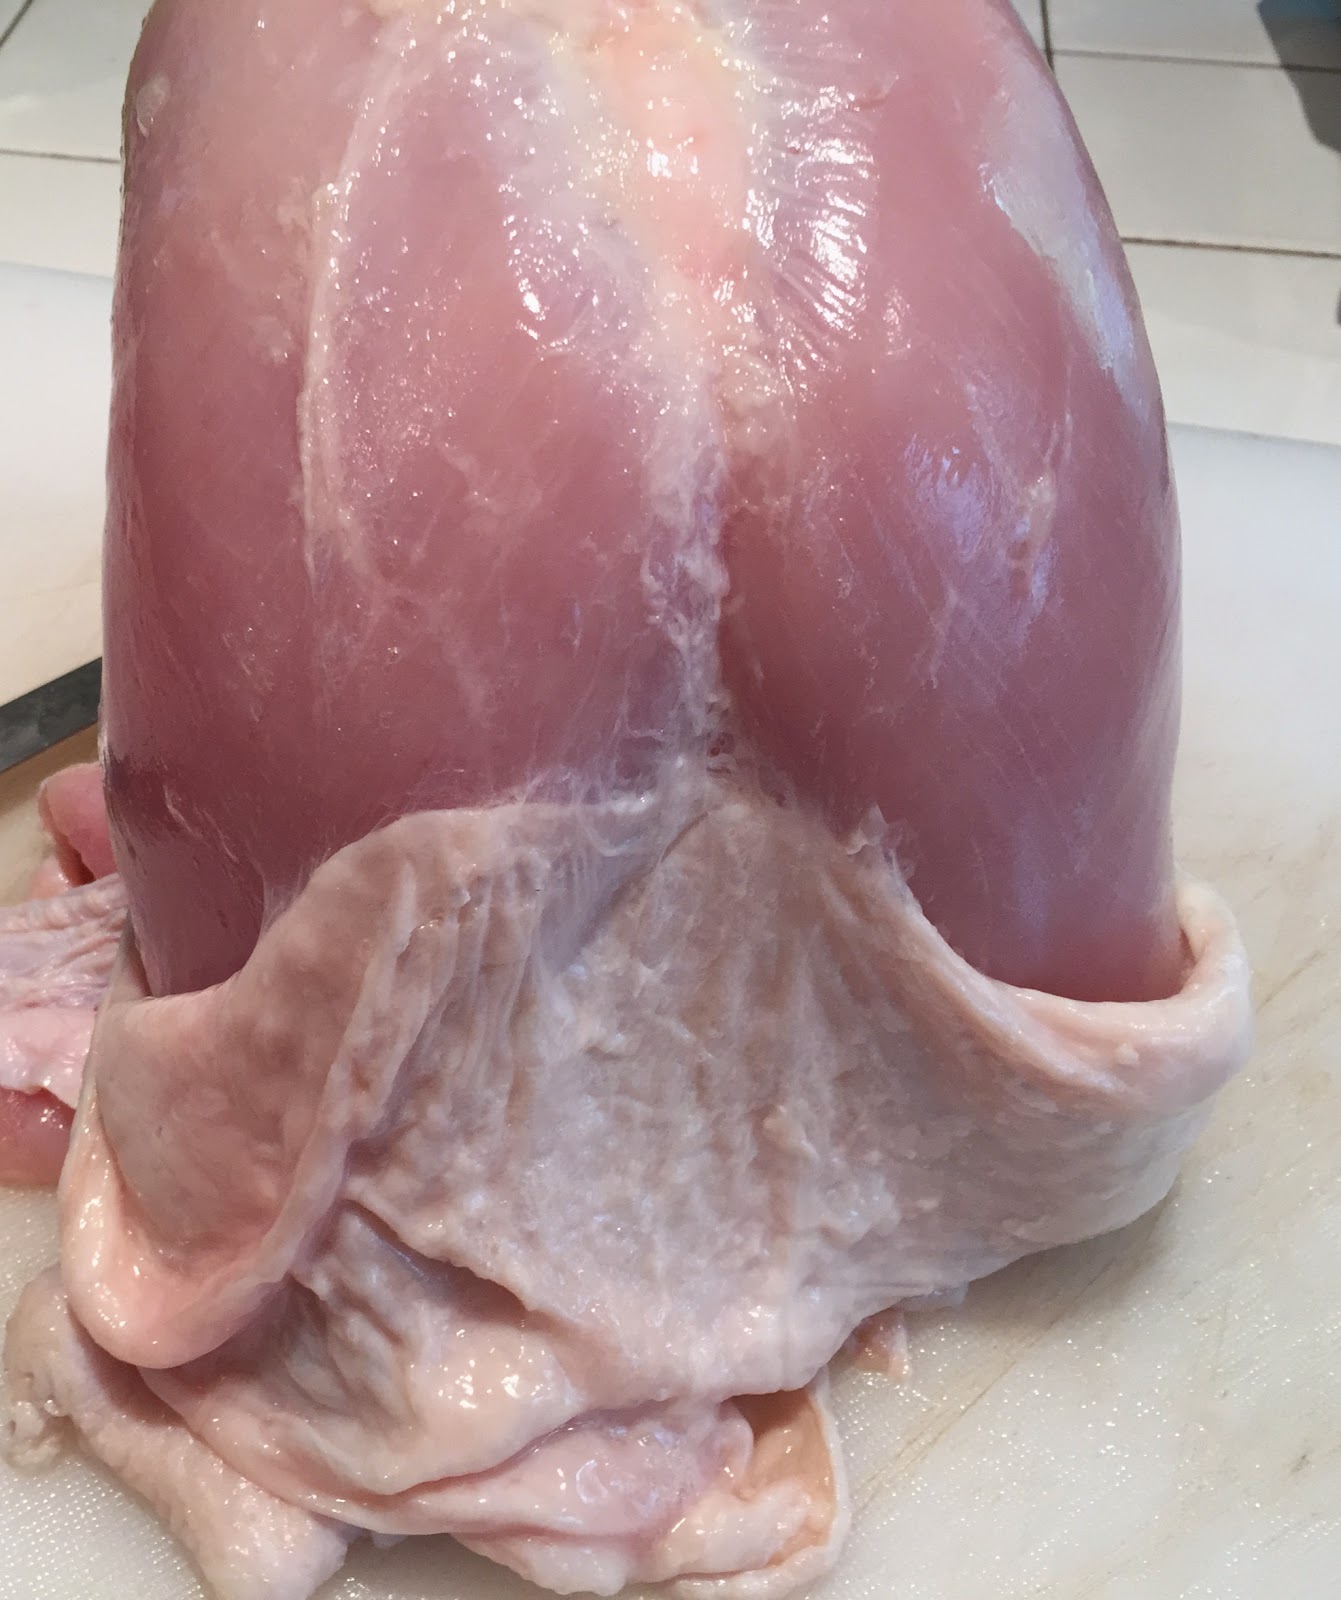
Here we go... Very carefully start pulling away from the skin from the meat. Do not tear the skin. Fingers will help you push through the membrane, which adheres to the surface of the breast. You might need to use a knife, but again be careful.


Here's me using a knife to assist with the membrane. Make very thin and light strokes to pierce the membrane and, at the same time, pulling the skin away from the breast.


Nicely done!!!!!!!

 The picture to the left is the breast untrimmed, which includes the tenderloin. Decisions have to be made now. Should you keep the tenderloin attached, or should you remove? The choice is predicated on two things? Do you have enough skin to incorporate the extra turkey sections? Do you want to increase the cooking time because the diameter is more substantial? If the answer is yes to these questions, then, by all means, keep it attached. Let's first see if you have enough skin to cover the whole roulade with the tenderloin. Invert the breasts on to the surface and wrap like a newborn baby. You're trying to see if you have enough skin to encase the entire breast. If you do, that's great, don't remove tenderloin. Again including the tenderloin will increase the diameter of the roulade and cooking time. The picture to the right is that of a trimmed breast.
Sample picture of a well-encased breast. So when I say invert, do you know what I mean? Look at the breasts. Do you see a thick end and a thin end? Place the thick end on small and encase with skin. If it looks similar to this, you're golden.

The time has come to make another decision. Should you dry-brine? I do every time, no matter what protein I am cooking!!! And here is the LINK-TO-WHY. Anyhow, I sprinkled just a tiny bit of kosher salt and a minute amount of poultry seasoning on both sides. Yes, both sides!

 Place Skin and Breast in the refrigerator for 12-24 hours. (don't rinse off the salt)
After the elapsed time spent in the refrigerator, decide if you want to inject with butter. Ok, I'll admit it, I'm a butter lover.


Lay down some parchment paper and using a powdered sugar shaker to apply some TG-RM. Now layout the skin on top of the parchment paper. Stretch the skin out too.

Yes, more pictures..... apply some more TG-RM to the top of the skin.

Apply TG-RM to every nook and cranny of one of the breasts and place in the center. If you decided to include the tenderloin make sure to apply TG-RM underneath the loin. Apply TG-RM to any location in which you think proteins need to bond.

Do the same with another part of the breast and place it on top. Make sure the thick part is lying across the thin section. Now using your hand begins shaping. Smooshing all the nooks and crannies together.


Some additional pictures to show you what it looks like in the initial stages. Not even close to resembling a roulade.


More profile pictures for perspective is essential.

Let's discuss herbs! Yes, salt is the only substance that will penetrate the protein matrix, but that does not mean we cannot perfume the meat. I've done it both ways, and this technique works well. Chop up a lot of traditional Turkey herbs, and don't forget to include parsley. Wait for it, wait for it....it's coming.

Stretch out 24-plastic wrap across a large cutting board.


Fold plastic wrap over breasts making sure to squeeze ends. Stretch the plastic wrap as you will ensure a tight cylinder. Roll a few more times.


Toss some herbs across the plastic wrap and give it a roll or two.
This is what it should look like.


Keep doing this until you run out of herbs.
The critical step-After you have run out of herbs, roll two more times. Now using some type of device that pierces (sausage pricker in the picture) puncture the roulade all over. After you have perforated the roulade with the pricker, you will need to roll it a few more times. Make sure you are squeezing and stretching the plastic wrap.
Why do we puncture? As the roulade starts to cook, it will release moisture and intermingle with herbs through the holes and perfume the meat. Note: Do not even consider laying the herbs directly on the meat. Direct contact with the meat will be overpowering, and we want subtle flavors.


THE ROULADE NEEDS TO SIT IN THE REFRIGERATOR FOR A MINIMUM OF 24-HOURS FOR THE PROTEINS TO BIND. DON'T SKIP THIS VITAL PART OF THE PROCESS.


The diameter will determine really how long to cook. This will change from Turkey to Turkey, and if you included the Tenderloin, it could be pretty big. From my experience, diameters will range from 85-115mm. You could use Baldwin's tables and extrapolate a time. You could also use the PolyScience Sous-Vide Tool Box I-Phone / I-pad app. Anyhow, I have never used a time below 5 hours. And I've done as high as 13 hours too. You will have to decide for yourself.
After the cook, you can choose to shock and refrigerate and finish later. I routinely shock and finish for later. If I plan on smoking first, a retherm is not necessary (the smoke provides the retherm). Sometimes I will smoke only, but to develop darker colors, I might increase the temp of the smoker to get a mahogany glaze. If I planned to grill, I would retherm in SV first before the grilling. Always make sure the surface to very very dry before finishing. If you like, you can season the surface with anything you want. You could also add mayo or another fat to accelerate browning


TOP OF THE PAGE


Comments
Post a Comment