Prime Rib Reconstruction #3 (Meat-Glue 2014)

(PO-2014) This is my third version...What's the difference? I bought the whole thing this time. Go big or go home. Before you ask, I did not pay the total price for these babies. I almost got it for half the price!!!
This post won't go into a tremendous amount of detail because I already covered it in the other two.

Separate all the muscle groups and remove the hardest fat, silver skin, and connective tissue. Don't destroy this hunk of meat.


All the separate pieces will be glued together.
NOTE: all pieces received .60% salt and were placed in a refrigerator for 24 hours to dry-brine.

Preliminary configuration
I needed to figure out how I would roll this baby up into a symmetrical cylinder.

The first thing you want to do is lay out a massive piece of plastic wrap and keep it connected to the box. I have a professional role that is 24 inches long. You're going to roll everything up into a tight cylinder which might take about 30-40 revolutions.
This is the Rib-Cap that I laid down first on a Transglutaminase (Activa RM) layer.

Sprinkle on more TG......

Start placing the other sections and coat every piece with TG getting it into every nook and cranny. The ends are essential too.

 Chop up a considerable amount of Italian Parsley, Rosemary, and Thyme.
As you roll up the cylinder, place layers of the herb mixture on top of the plastic, and do not contact the meat directly. As you continue to roll, place more herbs down until it's all gone. Squeeze the ends and stretch the plastic as you go along to ensure a tight cylinder.

Ok.... you're gonna need some help with this one. In fact, you might need a pair of pliers too. Make sure to squeeze the ends extremely tight while you roll. Tie off ends with multiple knots and again, have someone help you. Double Vac seal for SV. This baby was heavy, and it exceeded 18 inches..... get some help if you go big.


Using something that is very pointy, make tiny holes, and I used a sausage pricker to make small holes through the cylinder. While the meat cooks in the SV, the herbs will start to perfume the meat. This is a surface treatment at best, but it's delicious.
Set Circulator at 104 f... we will warm age for 3 hours and 30 minutes. After the elapsed time, increase temp to 128 f. It's gonna take between 10 and 15 minutes to get to set temp. Once has reached 128 f, set a timer for 10 hours. After you're all done, take the cylinder you and shock in the ice-filled bath for at least 2 hours. Refrigerate until you are ready for the next step.
Note: After the warming aging process, I always toss in boiling water to hasten the climb to my desired temp....90 secs is all it takes.
Disclaimer- Do not Warm Age unless you thoroughly understand the process.
Note: There could be concerns with Meat to Water ratio, so make sure your container is large enough to accommodate large pieces of meat for adequate water circulation.

 Ok...I took it out of cold storage, which was a week. I submerged the vac bag in hot tap water for about 15 minutes to warm it up a bit. Note: Save the purge.....what to do with the purge?. Make sure to pat dry with paper towels. It will not brown adequately unless it is scorched. My technique...pat with paper towels and set on the elevated trivet and a fan blowing directly on.

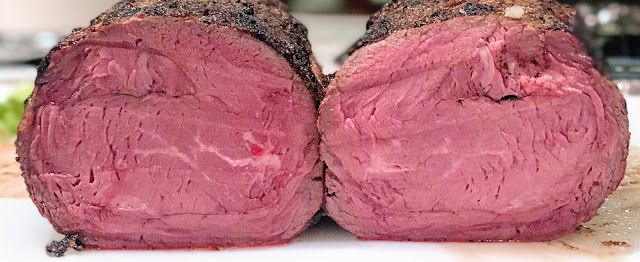
After it is scorched, proceed to the next step. This is what I did. I mixed butter with mayo and a touch of mustard. The butter and mayo act as a conduit which will enhance browning. Cover with anything you want except salt. It's already been salted, remember. I used my Genesis Grill to brown, which can get up to 750℉. I used a tray and a trivet. The whole process took 5 minutes.


PERFECT!!!!!!


Preliminary configuration
I needed to figure out how I would roll this baby up into a symmetrical cylinder.

The first thing you want to do is lay out a massive piece of plastic wrap and keep it connected to the box. I have a professional role that is 24 inches long. You're going to roll everything up into a tight cylinder which might take about 30-40 revolutions.
This is the Rib-Cap that I laid down first on a Transglutaminase (Activa RM) layer.

Sprinkle on more TG......

Start placing the other sections and coat every piece with TG getting it into every nook and cranny. The ends are essential too.

 Chop up a considerable amount of Italian Parsley, Rosemary, and Thyme.
 As you roll up the cylinder, place layers of the herb mixture on top of the plastic, and do not contact the meat directly. As you continue to roll, place more herbs down until it's all gone. Squeeze the ends and stretch the plastic as you go along to ensure a tight cylinder.

Ok.... you're gonna need some help with this one. In fact, you might need a pair of pliers too. Make sure to squeeze the ends extremely tight while you roll. Tie off ends with multiple knots and again, have someone help you. Double Vac seal for SV. This baby was heavy, and it exceeded 18 inches..... get some help if you go big.


Using something that is very pointy, make tiny holes, and I used a sausage pricker to make small holes through the cylinder. While the meat cooks in the SV, the herbs will start to perfume the meat. This is a surface treatment at best, but it's delicious.
Set Circulator at 104 f... we will warm age for 3 hours and 30 minutes. After the elapsed time, increase temp to 128 f. It's gonna take between 10 and 15 minutes to get to set temp. Once has reached 128 f, set a timer for 10 hours. After you're all done, take the cylinder you and shock in the ice-filled bath for at least 2 hours. Refrigerate until you are ready for the next step.
Note: After the warming aging process, I always toss in boiling water to hasten the climb to my desired temp....90 secs is all it takes.
Disclaimer- Do not Warm Age unless you thoroughly understand the process.
Note: There could be concerns with Meat to Water ratio, so make sure your container is large enough to accommodate large pieces of meat for adequate water circulation.

 Ok...I took it out of cold storage, which was a week. I submerged the vac bag in hot tap water for about 15 minutes to warm it up a bit. Note: Save the purge.....what to do with the purge?. Make sure to pat dry with paper towels. It will not brown adequately unless it is scorched. My technique...pat with paper towels and set on the elevated trivet and a fan blowing directly on.
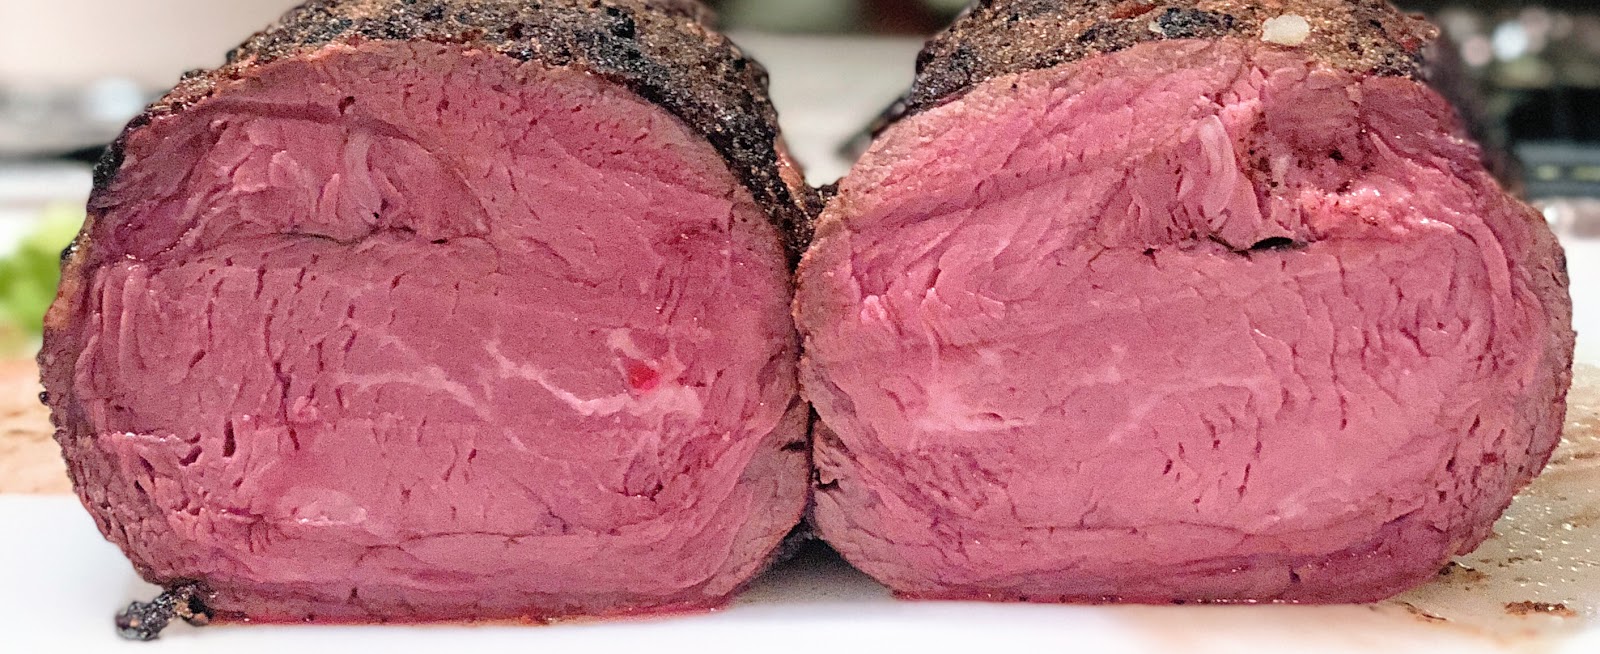
After it is scorched, proceed to the next step. This is what I did. I mixed butter with mayo and a touch of mustard. The butter and mayo act as a conduit which will enhance browning. Cover with anything you want except salt. It's already been salted, remember. I used my Genesis Grill to brown, which can get up to 750℉. I used a tray and a trivet. The whole process took 5 minutes.


PERFECT!!!!!!


Comments
Post a Comment