The Ultimate Sous-Vide Tri-Tip!!!!!

After extensive research, which just means I ate a considerable amount of Tri-Tip, I can definitively label this post as the Ultimate Sous-Vide Tri-Tip. I've taken a few of my techniques (outlined HERE) and combined them to make this perfect Tri-Tip.
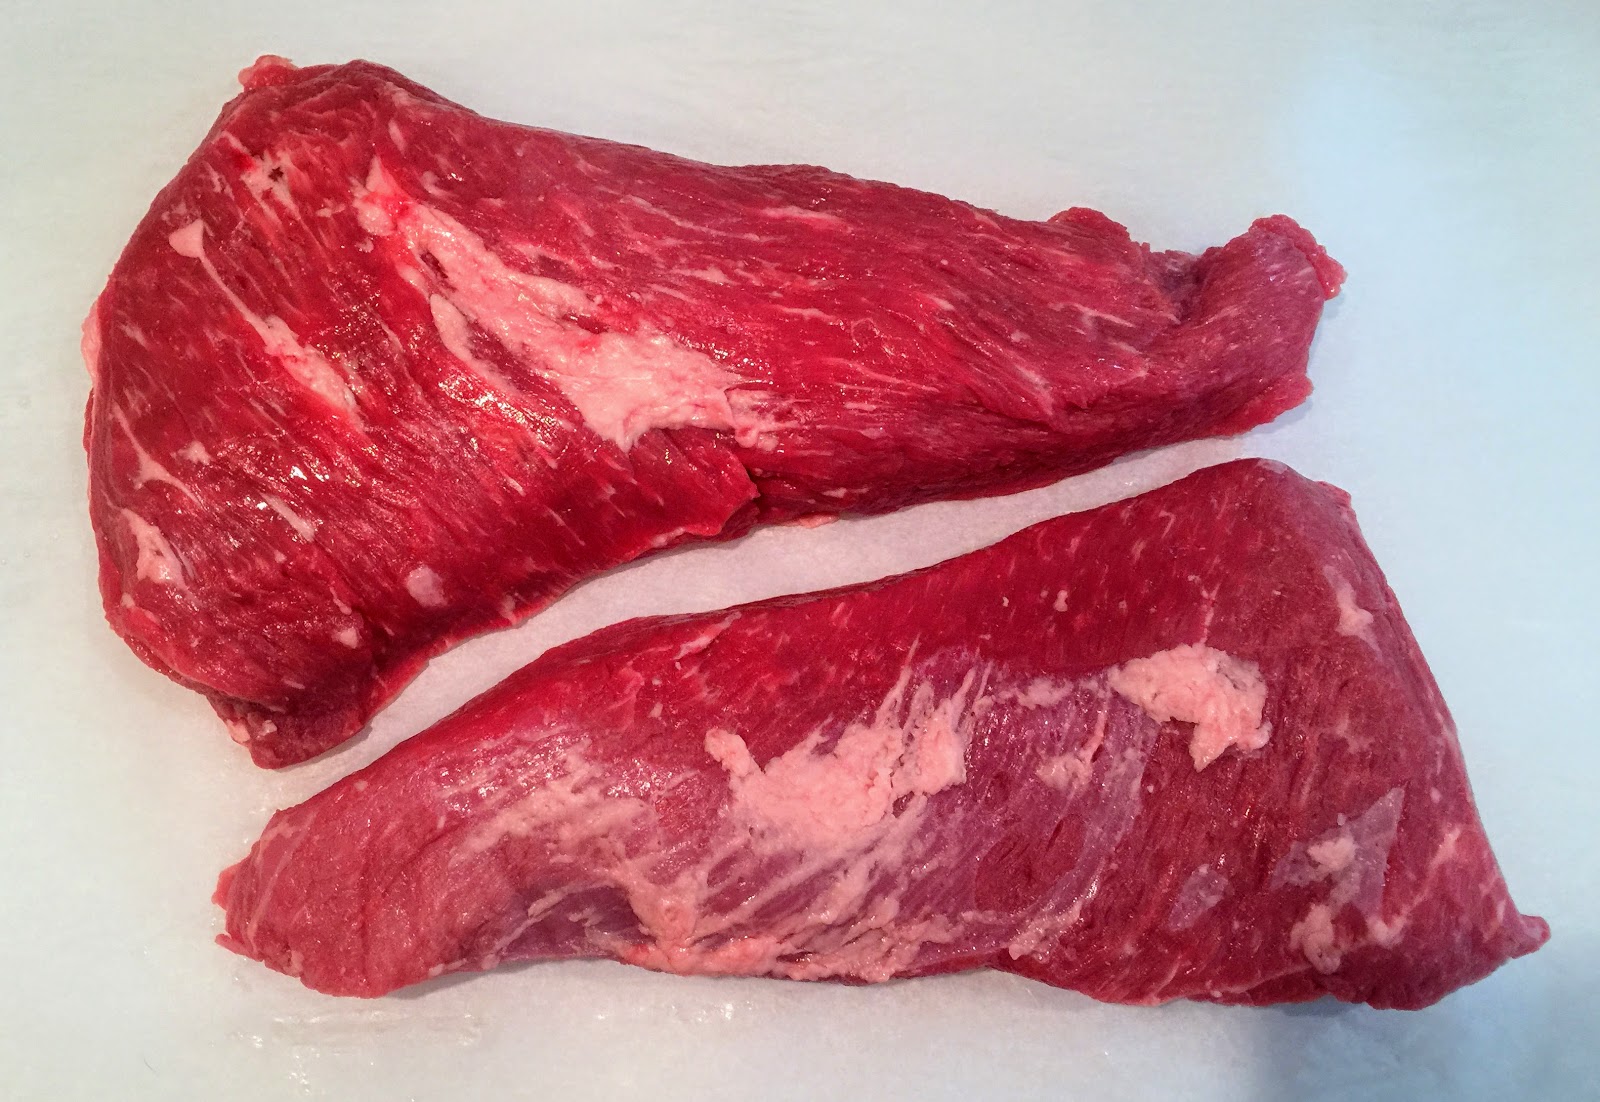
 I will be adding by weight 1% Red-Boat Fish Salt. They will be dry-brined for 72 hours. I've found that the glutamates in the fish salt take a little longer to penetrate, so the 72 hour time is essential. Dry-brining with Fish Salt is a Faux aging technique. You can read about it with the link I provided above. How to calculate 1%? You can look at my notes on curing HERE. But it's effortless to do....you need a gram scale. If the meat weighs 1000 grams, you will multiply 1000 grams by 1% or .01, which = 10 grams. After you have calculated how much salt you need to rub it into the meat. Make sure to spread the salt into every nook and cranny evenly.
 Note: If you don't have fish salt and still make a kick-ass Tri-Tip, use 0.60% Kosher Salt or 1.5-2%% Montreal Steak Seasoning or whichever premade mixture you have on hand. With salt and premade blends, Dry-Brine 12-24 hrs.
 Why dry brine? Dry-brining will denature the protein strands making them more tender and will preserve moisture. Salt will increase the flavor of the protein too. Dry-brining will force moisture to the surface of the protein and will dissolve the salt. Now comes the best part!!! All of that moisture on the surface, along with the salt, gets reabsorbed, which unravels the protein strands (denaturing), making for a better-tasting, much more tender protein. More importantly, these denatured protein strands will hold on to more moisture through the cooking process.

Note: if you don't have fish salt, you can use any salt or rub with salt you want. The salt is the only thing that will penetrate. The rub is mostly a surface treatment but still damn good. Fish salt brings the Tri-Tip to the next level. Very important to read... if you decide to use a rub or salt, all you need is 12-24 hours.
🔴🔴More reading on Faux Aging🔴🔴
🔴🔴 Here’s a link where I compare 5 different Fish Sauce Products. 🔴🔴
Going to Warm Age, aka Low Temp (LT) 2 Stage Souv-Vide Cooking… the Meat too…..
The story goes like this... By bringing up the temperature of the meat to 113 ℉ Degrees for X amount of time, you increase the activity of the Calpain and Cathepsin. These are the same enzymes that are present during traditional Dry-Aging that is done in Refrigerators. Of course, with Warm-Aging, the process is hastened. Tender meat is the by-product of the enzymatic process.And yes, it's safe to do. Anything less than 4 hours is safe. Ahhhhh....do your own research. If you have a compromising immune system or suffer from an autoimmune disease, I would be extra careful preparing food using this method.
Step 1- Coat protein with 1% of Fish Salt.
Step 2- Vac Seal and Dry-Brine for 72 hours. (optional Jaccard see below) Remember, just rub or salt 12-24 hrs.
Step 2- Vac Seal and Dry-Brine for 72 hours. (optional Jaccard see below) Remember, just rub or salt 12-24 hrs.
Step 3- Preheat Water to 120 ℉ degrees.
Step 4- Toss in Vac Bags and lower temp to 113 ℉. (Warm Aging)
Step 4- Toss in Vac Bags and lower temp to 113 ℉. (Warm Aging)
Step 5- Cook for 3-4 hours at 113 ℉
Step 6- Raise temp to 133f and cook for 7-8 hours. 8 hours is excellent, but if you come across a really big Tri-Tip, you might think about 9- hours. Note: to raise the temperature of the water expeditiously, add boiling water.
Note- If you get your meat at Costco, they mechanically tenderize (Jaccard) their meats. Meat that has been Jaccarded can sometimes cook faster. It really depends on how thick the meat is and how it was Jaccarded. Non-Jaccarded meat can sometimes take 1-4 hrs longer to achieve the same results as mechanically tenderized meat. Buyer beware.....
Note- If you get your meat at Costco, they mechanically tenderize (Jaccard) their meats. Meat that has been Jaccarded can sometimes cook faster. It really depends on how thick the meat is and how it was Jaccarded. Non-Jaccarded meat can sometimes take 1-4 hrs longer to achieve the same results as mechanically tenderized meat. Buyer beware.....
Step 7- Shock to a lower temp (well below 70 ℉ before refrigeration). Or after a brief shock, you can finish or shock them longer and refrigerate until you're ready to finish.
Step 8- If you want to eat right, place it on the counter for about 10-12 minutes flipping it at least twice. Then, remove protein from the bag, and dry it off. Optional- I like to use a fan to ensure complete drying.
Step 9- Place seasonings (no salt) on meat and finish any way you want. I mostly use my Weber Genesis grill, which I can get up to about 700 f. I love using Mayo and a little BBQ Sauce which will aid you in the searing too. Add mayo/BBQ sauce first before adding the spices.
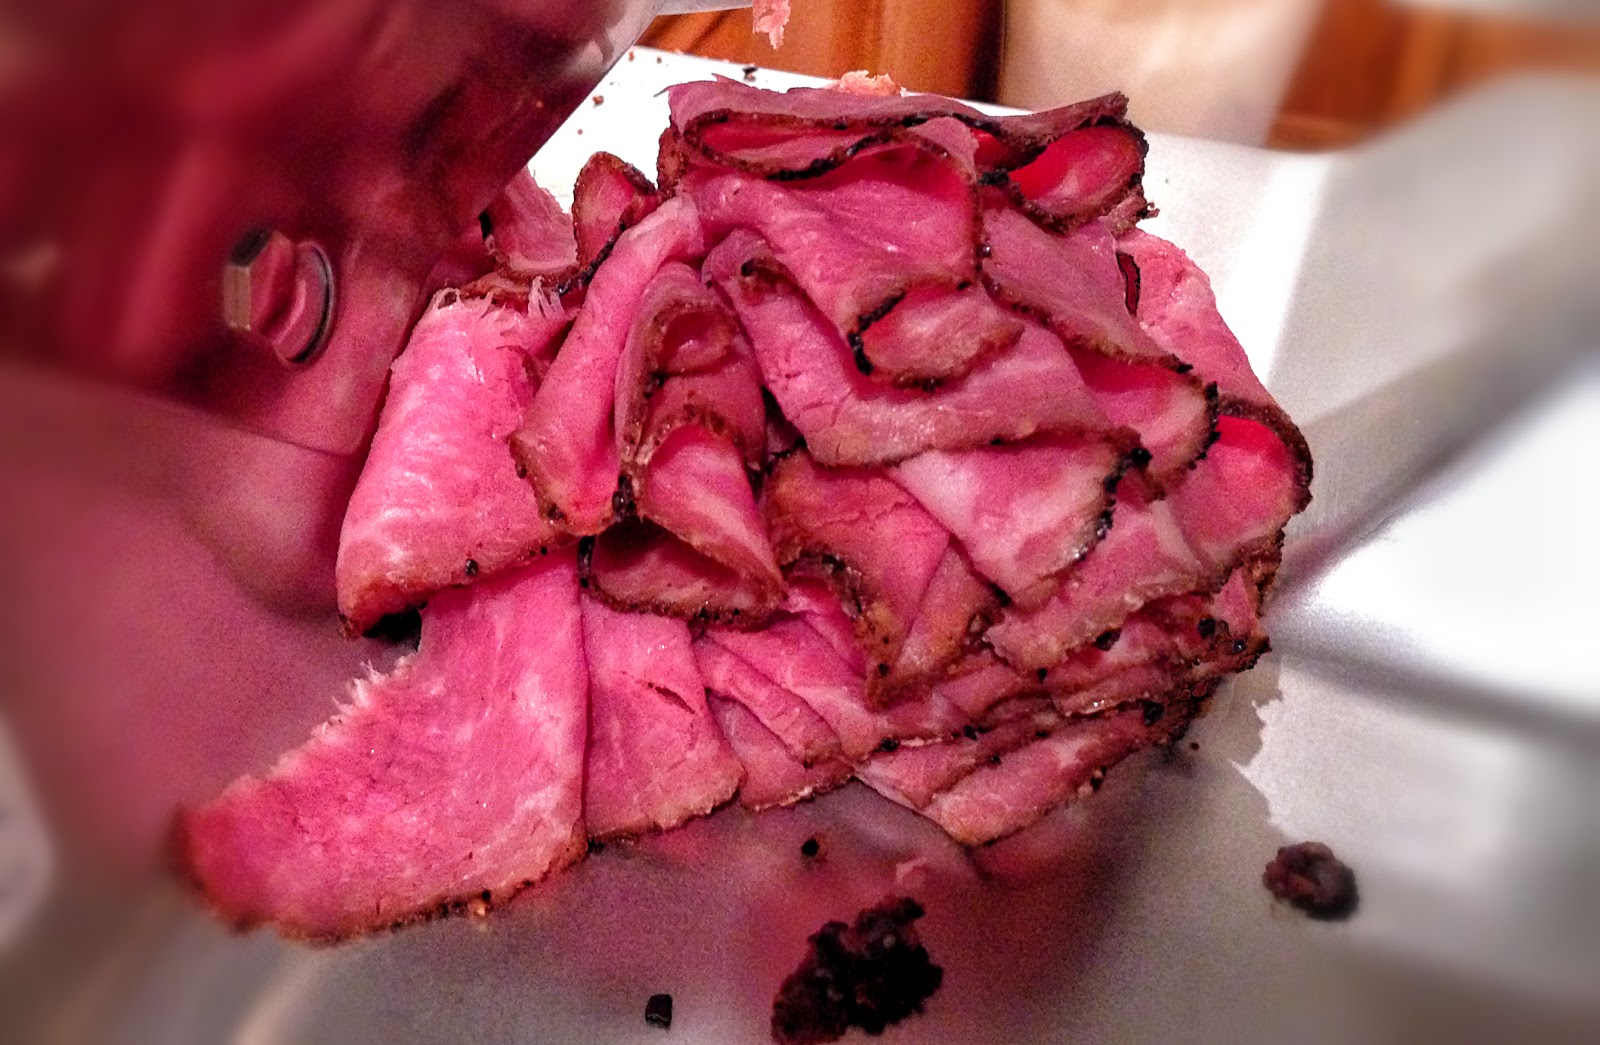
Step 10- Slice across the grain. See pics at the bottom.
Ahhhh, a Caveat.....
Many people love the cooking method called "Reverse Sear." If you do not know what that method entails, allow me to briefly explain. Very similar to Sous-Vide cooking but uses a traditional heat source (I use BBQ, Smoker, or Grill for flavor). The protein is placed in the heat source at a temp between 160-225℉ (I use 180℉-200℉), and the temp is slowly increased to the desired internal temp. Protein is then cooled at room temp (What I do? I will place it in the freezer for 5 minutes first, then the refrigerator for 10 minutes). And then finished as desired (Grill, Pan, etc.). Some people love the taste of reverse sear over traditional Sous-Vide. I say you can combine both cooking methods.
Step 7A- Shock to lower temp and refrigerate until at least 6 hours.
Step 8A- Dry thoroughly (Step 8) and season any way you want.
Step 8B- Place very cold Tri-Tip into alternate heat source set at 180℉. Then, heat Tri-Tip below the finished Sous-Vide Temp (i.e., choose 125℉...my fav).
Step 8C- Remove from the heat source and let cool for about 5-15 minutes.
Step 8B- Place very cold Tri-Tip into alternate heat source set at 180℉. Then, heat Tri-Tip below the finished Sous-Vide Temp (i.e., choose 125℉...my fav).
Step 8C- Remove from the heat source and let cool for about 5-15 minutes.
Finish from Step 9- but do not add any seasonings.
BIG NOTE- After Sous-Vide-Processing uses a Step-Down-Cooling Process. This process was created by CREA. This procedure will improve the texture and moisture retention. After processing, removes protein from the bath and set it on the counter for 10-15 minutes, flipping a few times. If using right away, proceed to the finishing step. For long-term storage, place protein in cold tap water for another 10-15 minutes, then Ice-Shock utilizing a lot of ice and water until the temp drops significantly before refrigerating.
An additional option if you want to try something exciting and new.....
You can use the Jaccard (mechanical tenderizer) to force seasonings into the protein.
&


MORE PICS HERE
VIDEO ON HOW TO CARVE UP A TRI-TIP
TOP OF PAGE


Thanks for sharing. Sous vide cooker is definitely the best investment I've made this year. Now I can cook steak to perfect every time.
ReplyDelete