Keto ChickChips

 When you think of eating chips, I am sure you're not thinking of chicken. Well, to be honest, I wasn't either. My daughter found this high protein chip and wanted to know what I thought of them because they are keto-friendly. Yes, I keep Keto on and off, but with the way I cook and eat, it's a struggle! Anyhow, I looked into the chips protein source, and it's mostly dairy. I have family members that are lactose intolerant, and I thought to myself I can do way better. They cost between 2-4 dollars an ounce too. Dang, that's a lot of dough (think gluten-free ...LOL) for a dairy chip. I thought to myself dang I can make a low carb-chip too, but I am gonna use chicken as my source for protein (the beef version is coming soon). When it comes to using Meat-Gloo (Transglutaminase, aka Activa RM), I am the king. Anyhow take a page out of my book and make these babies. They are extraordinary. This technique alone has opened up other culinary wonders, which I will share with you later.

 Start out with Boneless-Skinless-Chicken thighs. Mine weighed in at 1746 grams. I would suggest making at least 900 grams worth. I prefer to use the metric system because it's so much easier to work with, especially with percentages. Oh yes, there is some easy math percentages you have to do. Don't be alarmed, it's straightforward.
 Clean up the thighs looking for excess cartilage and bones. Cut into bite-size pieces and partially freeze. Freezing them a bit makes it easier to process in a food processor grinder.

1746 grams X 1.2% (or .012)= 20.952 (Rounded up to 21 grams). Do the same with the salt. So dang easy.

Working in batches process thighs into a fine grind, as shown in the photo. Place in a kitchen aid mixer or something comparable. Mix together the Salt, Cure, and RM. Set Mixer to low, and while the machine is running, add a tsp at a time until thoroughly incorporated.

I used a 24-inch plastic roll stretched out across the cutting board. Wet down the plastic before placing the meat in the center. The water will aid in rolling and making the chicken more manageable.

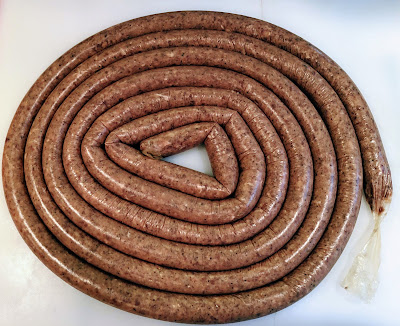
Shape into a log. The diameter is up to you, but it will shrink during the dehydration process. As you shape and roll, make sure to squeeze the ends rolling in the opposite direction. Squeeze out all the air, all the while shaping into a log/cylinder. I must have rolled this thing 25 plus times.

The cylinders were tied off with butchers twine. The twine was rolled around the ends many many times until it was extremely tight. I cannot emphasize how important it is to tie very tight.

 For the Geeky and Nerds out there, this is an electronic caliper. The diameter measured at 78.5mm (3 inches). I am documenting T & T's for a later article. The article will be contrasting existing T & T suggestions as well as apps. Also, I will focus on the danger zone, Log Reductions, and Pathogen proliferation. Measure before vacuum sealing if you decide to do this, please.
 Note: After Vac-Sealing the Chicken needs 36-48 hours to cure (24-Bind protein). With the help of the Activa-RM (Meat-Gloo), it takes a minimum of 24-Hours to bind the proteins. Do not skip this time under refrigeration.

On the large one, I attached Foam-Tape and a probe. The tape allows the piercing of a thin probe without compromising the integrity of the vacuum. The T & T data is collected every 5-secs and collated in a spreadsheet.

The Logs were SV-Processed for 4.13-Hrs at 145.5℉. The next part is for the Geeks in all of us. At the 2-Hr mark, they reached 140℉, and at the 3.13-Hrs, they hit 145.5. That last 1/2 of a degree takes a long time. To achieve equilibrium (protein and water is at the same temp) at haste, I always add a 1/2 a degree. The goal was to start the clock to pasteurize at 145℉. At 145℉, adding 3-Min at 41-Secs would have achieved a 6.5D Log Reduction (see MC-books Vol 1, Chap-1). I took them to 4.13-Hrs. I won't bother telling you how high the "D" level is, but it was very high. To say these babies were pasteurized would be an understatement. To figure out the new "D" level, it takes some math. Take a guess, and if you get it right, I will tell you. After they came out of the bath, I shocked them in about 18 lbs of ice. Yes, a lot of ice, and yes, it's necessary for the thermal mass. At 2-Hrs, it hit 68.7℉, 3-Hrs at 44.5℉, and at 4.23-Hrs, it got down to 35.4℉.


Unrolled from its plastic heaven.


Coated with a tiny bit of mayo.......

Use a non-salt product and coat....it already contains salt, and we are going to add some more.


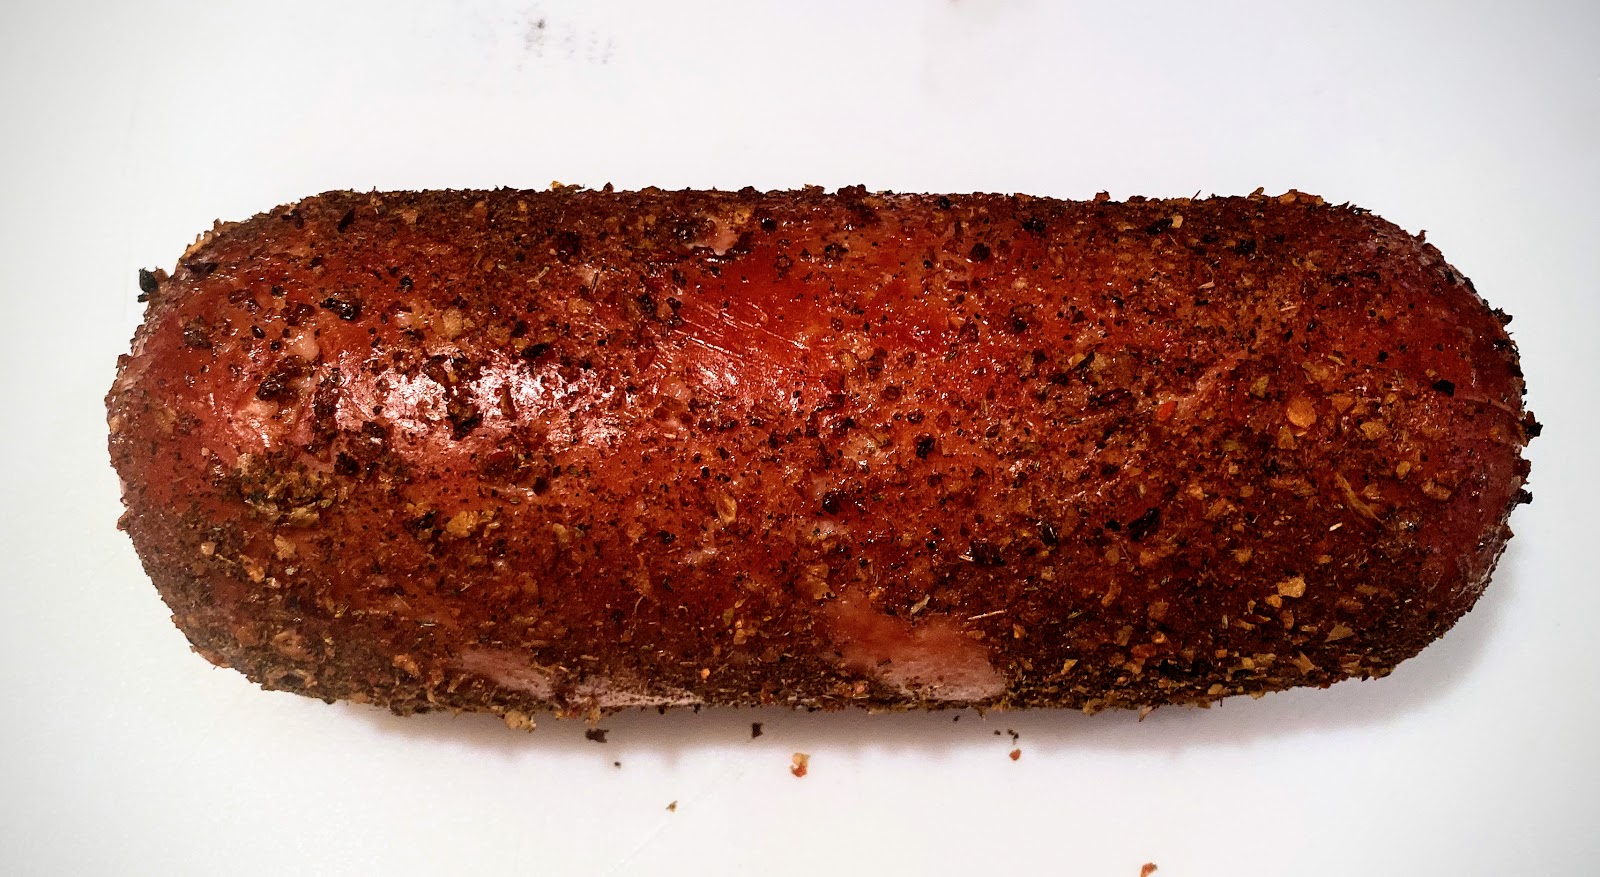
Using Cherry wood, they were Hot Smoked at 275-300℉ until golden. The protein never exceeded 135f.
After they came off the BBQ, they were shocked (water and ice) using a significant bag using the displacement method.


After shocking, the cylinder was placed in the freezer to partially freeze. Freezing a bit helps with the slicing. I selected 2.5 on the Berkel. I tried several sizes and settled for 2.5. The next batch will be 2.


Getting ready for the Dehydrator. Using a pastry brush, I lightly coated with avocado oil. If the chicken had been infused with some spices and herbs, I could most likely skip this next part. I have a 10-Tray Excalibur Dehdyror, and I used up 7 trays.


I used 3 different rubs, but these 2 were my favorites. The Garlic pepper rub was off the charts GREAT.

Review- Freakishly good. When chopped up, the chips could be used as Bacon Bits, and no one would be the wiser. I plan on making a Bacon Version using my Bacon Recipe. I also plan on making some other crazy stuff too. I had a request from my daughter for Nacho-Cheese, Vinegar, Ranch, and several different versions that are common in the stores.


Comments
Post a Comment