The Laudable Knish!!!!

"The Laudable Knish...". I have eaten every kind of Knish under the sky!! Well, that's not exactly true. I have eaten my fair share of Knishes over the years, and I have a favorite, and I am here to share it with you. My favorite Knish is a Short-Rib version combined with potato and onions topped with rich beef gravy.
What puts my Knish over the top and makes it stand apart from other Knishes is the addition of Schmaltz and Gribenes. Click on the link if you don't know what Schmaltz and Gribenes are. You cannot make great Jewish food without it. To understand what I mean, I offer this analogy "Schmaltz and Gribenes are to the Jew as Lard and bacon bits is too the Goy" "Therefore this is the Chosen Knish."

Before we move on to a recipe, we need to define what a Knish is and why it's the perfect Jewish snack food.
A Knish is an Eastern European nosh created by the Jewish people. The Knish is covered by dough and is usually filled with some filling. From savory to sweet, it's all good.
However, if we want to explore the Origins of the first Knish, we look no further than NYC. Yonah Shimmel's Knish Bakery is an NYC landmark that sells the original Knish that started in 1890 on a pushcart. Yonah Schimmel was a Romanian immigrant who started it all using a cart to begin his now acclaimed Knish Bakery. I was fortunate to have eaten here as a young boy because my grandmother only lived a short distance away. To read more about this beautiful Knish landmark, click the link above.

Most Knishes are filled with some sought of potato onions and a combo of ingredients, and they can be baked, deep-fried, or grilled.

From broccoli, cheese to sauerkraut, and the potato, a Knish is only limited to one's imagination.

Knishes can be round, square, rectangular, or any shape one can think of. Some are entirely sealed, or some have an opening at the top.

Let's talk about the stuffing. I love Short-Ribs.!!! Short-Ribs have incredible flavor and benefit from a long slow cook. My Short-Rib recipe is simple to make. Short-Ribs can be purchased boneless or on the bone. You can choose whatever you want but consider this, bones provide better flavor for the broth. I bought my Short-Ribs at Costco. Basically, all you want to do is braise the ribs in a mirepoix until the meat becomes fork-tender. Of course, you want to reserve the braising liquid for later use (the gravy, of course).

After I explain how to braise Short-Ribs, I will discuss how to put it all together. This is very simple to pull off. Next, of course, is the dough. You can use almost any good dough for a Knish-and storebought puff pastry works excellent too.
A simple Braising Short-Rib recipe follows. I usually do this in advance. Consider freezing if you do it more than 4 or 5 days out.
Recipe
2-4 lbs of Short-Ribs (bones or not its up to you).
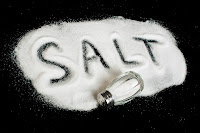
Salt and pepper
Canola oil for frying. I like canola because of high smoke point.
Mirepoix as follows:
1 large onion, 3 large carrots, 6 cloves of garlic, 2 celery stalks (Medium chop)
1 cup of Red wine
2 tbl tomato paste
1 Bouquet Garni Place in a cheese cloth bag 1 bunch of fresh thyme and parsley , 2 bay leaves and 12 pepper corns.
Water, beef or chicken stock to cover.
Directions:
Season ribs with salt and pepper. Coat the bottom of the pan with canola oil and get super hot in a large dutch oven. Brown short ribs until nicely caramelized, then set aside. If too much fat renders, spill it out.
Coat pan with canola oil if needed. Toss mirepoix in the pan, season with salt and pepper, and cook until very caramelized while scraping fond (brown bits on the bottom of the pan). After everything is caramelized, add tomato paste and cook for a few more minutes. Toss in red wine and scrape the fond off the bottom of the dutch oven. Reduce by half. After everything has been reduced by half. Add short ribs, broth, or water just above the ribs. Throw in the Bouquet Garni. Cook covered for 3 plus hours on a very low flame on simmer. Turn the ribs halfway through the cooking process. After the meat becomes fork-tender and almost falling apart, remove the heat source. Strain broth through some type of strainer lined with cheesecloth and reserve. You can DE-fat the broth if you want to.

This is what the Short-Ribs look like after being shredded and DE-boned. You can do this whole step a week or several weeks out and freeze and then defrost when you are ready to put together your Knish. The Short-Ribs you see in the picture were made 2 weeks ago and are being heated through with some of their own broth.

The Shredded Short-Ribs in the picture weighs precisely 2 lbs. I will add to this an equal amount of Mashed Potatoes and 2 large caramelized onions.

Two huge onions caramelizing with garlic.

Caramelized onions and Shredded Short-Ribs combined.

Mashed potatoes. I make my mashed potatoes with salt, pepper, cream and butter.

Everything starting to pull together. I added the onions, scallions, parsley, and potatoes.


I added the Creme de creme (best of the best) and none other than Schmaltz and Gribenes that sets this Knish apart from others.

How much Schmalz and Gribenes add is a personal choice. Add some and taste. Does the Knish mixture taste good? Oy, if not, just adjust and move on. It is now complete.

I used the reserved Short-rib broth and added to this extra beef bones and made a very beefy rich broth. I sauteed mushrooms and onions and a made roux. I added the broth, cream, and parsley, which became my topping.


Looks Beautiful topped with sour cream, doesn't it.


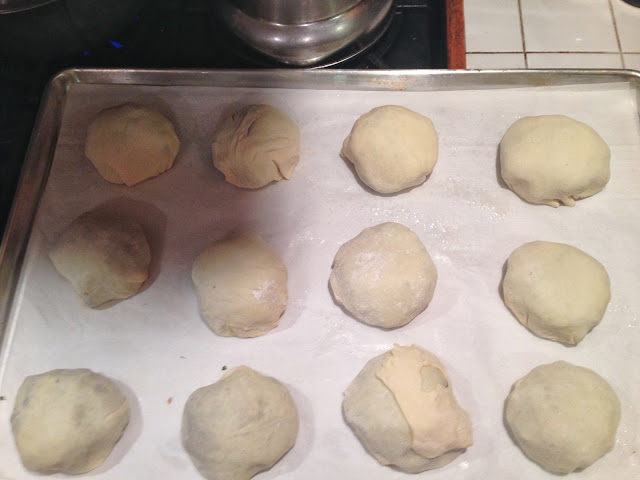
Below we will explore the different dough options.
CLICK READ MORE TO SEE IT ALL
Knish Dough options
Dough #1
The easiest of them all is store-bought Puff Pastry dough. All you do is defrost and cut into desired sizes and shapes. Mix egg with a bit of water, brush your Knish and bake until golden. DONE!!!!
Dough #2
Filo dough is another option, although more challenging to work in my opinion. You can create many layers with Filo dough and if you choose this approach, just make sure you butter each layer.
Special note: To tenderize your dough add 1 tsp of vinegar or lemon juice to 1 cup of flour called for in a recipe.
About the addition of FAT: you gotta have fat in your Knish dough, and try replacing some of the fat with Schmaltz.
One last thing, and this is important. Mix all the dry ingredients first and add to the wet ingredients. After making your Knish dough, you can store it in the refrigerator for several days. After you make your dough, place it in the fridge for about an hour, I suggest hydrating. Take DOUGH out about an hour before use. This will so the gluten relax. For a detailed description of making the dough, I suggest GOOGLE!!!!
# 3 My Favorite Knish dough
- 8 ounces of softened cream cheese (chive and herb cream cheese is fantastic)
- 8 ounces softened unsalted butter
- 1/2 cup sour cream
- 3 1/2 cups of AP flour
- 1 tsp of salt
#4
- 1/3 cup of canola oil
- 5 large eggs beaten ( add to the color(
- 3/4 tsp salt
- 2/3 cup filtered water
- 1 pound or more of AP flour
#5 ( Good frying dough)


- 3 cups of AP flour
- 1/2 tsp salt
- 1/2 cup of oil Canola, Veg, Sunflower oil
- 1 cup of filtered water.
#6
- 11-16 ounces of AP flour
- 1/2 tsp baking powder
- 1/2 tsp of salt
- large egg beaten
- 1/2 cup of fat....you choose. I like Schmaltz
- 1-2 tsp vinegar
- 1/2 of filtered water


Comments
Post a Comment